
One of the main needs of a small business or startup is to have a reliable mail system with its own domain that helps differentiate on the Internet. Although there are lots of hosting plans offering free email accounts and even you could set up your own mail server, you are probably already used to mail services like GMail and would like to continue using it to also manage mail from your own domain without having to come to paid solutions such as G Suite (formerly Google Apps), which though inexpensive for the services you get in return, they represent an additional cost that your incipient project might not afford.
If this is your case you will be happy to know that thanks to the free tier offered by Amazon Web Services (AWS) in some of its services such as Amazon SES and Lambda , you can build a mail system at no cost that integrates seamlessly with your GMail free account, and at the same time allows you to send and receive mail from multiple mailboxes within your own domain.
The procedure below is not exclusive to GMail accounts. Any other email service that lets you send mail choosing the name and address you want to appear in the From: field will be suitable. Receiving mail from your domain does not even require any additional feature, so any email service, whether Office 365 Outlook, Yahoo or iCloud Mail will do.
IMPORTANT : Check out the limits of AWS free tier and the costs you will incur if you exceed them. Even though they are quite broad for the purpose of this article, they could result in an economic loss that was not planned. Remember that if you carry out this procedure you do it under your entire responsibility.
1. Create new DNS zone for your domain on Amazon Route 53
The first step is to create a Public Hosted Zone for your domain on Amazon Route 53 if you don’t have it yet. To do this, access to AWS console and go to Route 53 - > Hosted zones -> Create Hosted Zone. You can harness this step to add some DNS entries if you need them, such as A records that point to your website or SPF record as a security measure to prevent the email addresses within your domain from being spoofed or your messages from being considered as spam.
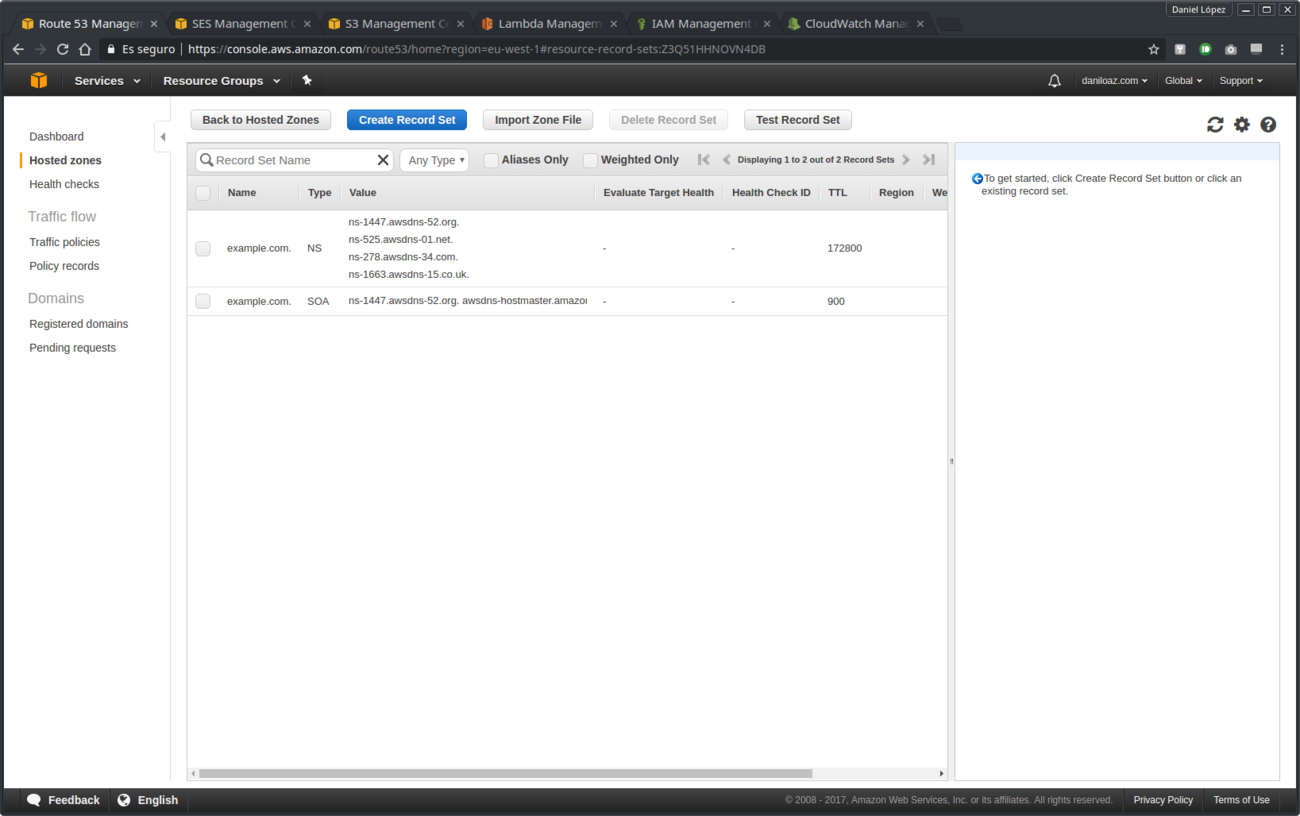
Basic public DNS zone newly created in Amazon Route 53
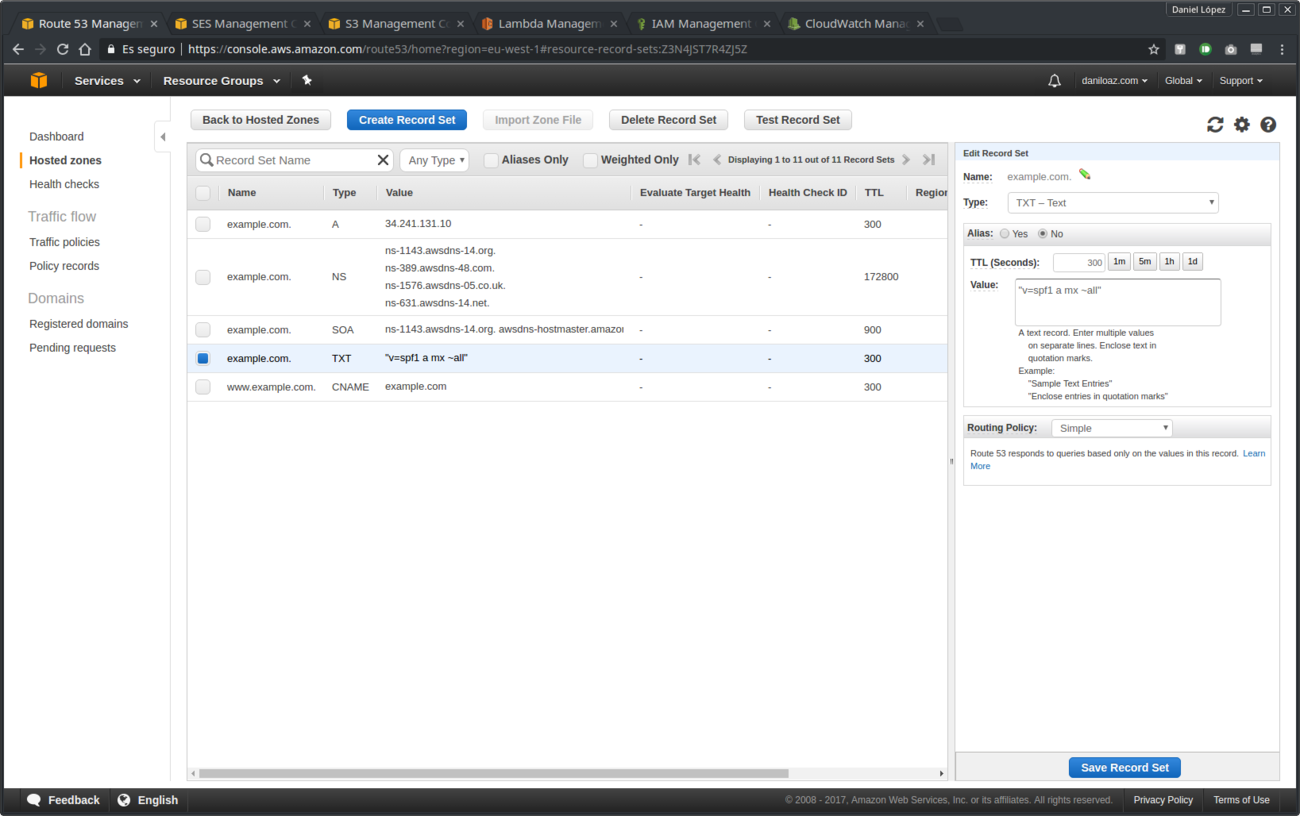
Example SPF record in DNS zone
2. Verify your domain on Amazon SES
Open a new browser tab and go to Amazon SES service through the AWS console. Choose the Domains menu option and verify your domain, which will cause new DNS registers to be created in your Route 53 DNS zone as you can see in the following images:
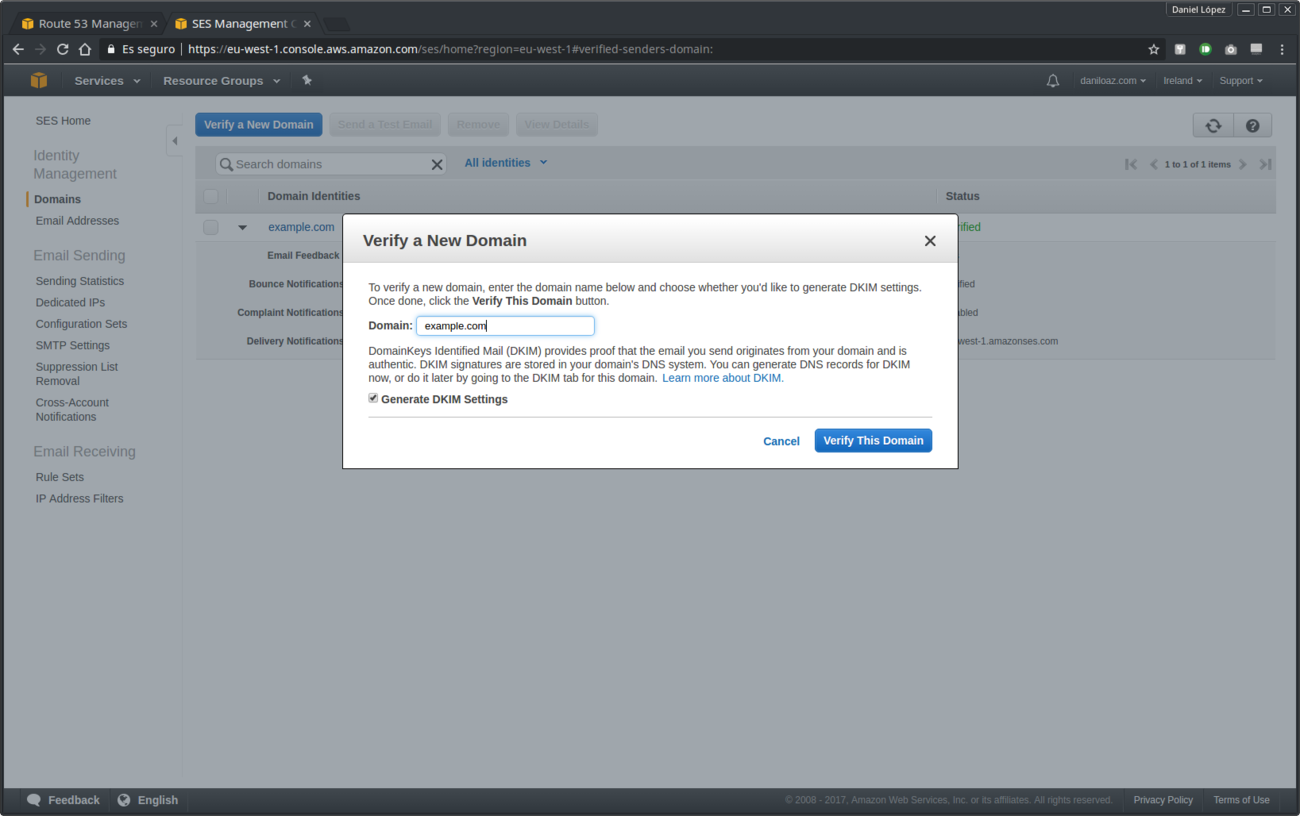
Domain verification in Amazon SES

Domain verification result
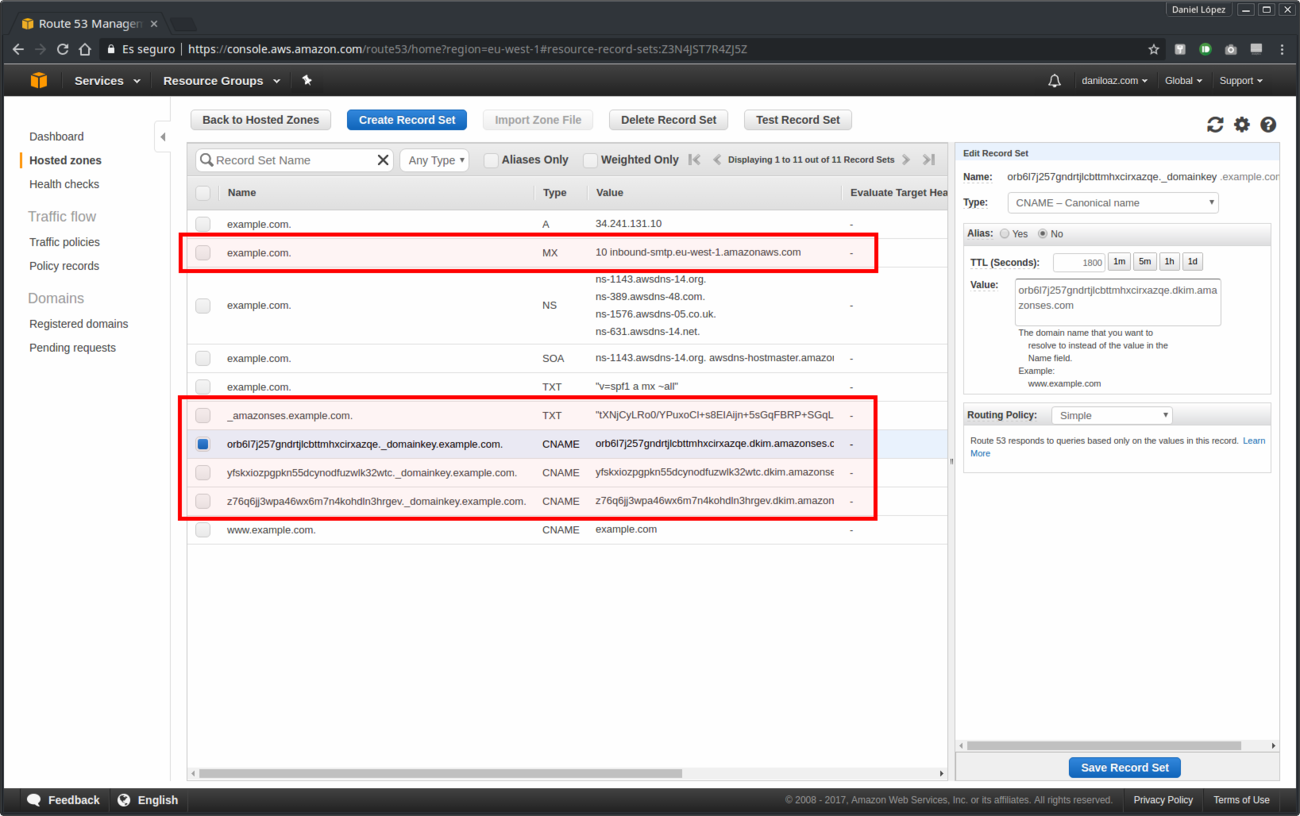
New DNS records added to zone
IMPORTANT: Route 53 DNS zones cost $0.50/month per domain. If you don’t want to incur this expense, you can copy at this point all DNS records that appear in the last screenshot to the DNS management console of your current domain registrar or other DNS provider. If you prefer to use the Route 53 service you will have to update your current domain’s DNS servers and put in place those provided by Amazon (NS records of the last screenshot).
3. Create a Lambda function to forward incoming mail to your GMail account
This point includes two steps. In the first place you will create a Lambda function by opening the main page of Amazon Lambda service in a new browser tab and clicking on Create a Lambda function. You will select a Blank Function and skip Configure triggers step. In the screenshots below you can see the form fields that need to be filled in order to create the needed Lambda function.
The Node.js source code for this Lambda function is based on this GitHub repo: https://github.com/arithmetric/aws-lambda-ses-forwarder. The following are the only changes I had to make in that code to illustrate my example, which has been tested and works satisfactorily:
var defaultConfig = {
 fromEmail: "info@example.com",
 subjectPrefix: "",
 emailBucket: "example-com-mailbox",
 //emailKeyPrefix: "emailsPrefix/",
 emailKeyPrefix: "",
 forwardMapping: {
 "info@example.com": [
 "example@gmail.com"
 ]
 }
};
The second step revolves around modifying the security policies associated with the IAM role that is automatically generated when creating our Lambda function. You need to add two new policies: one to allow access to the S3 bucket that will be created later to store mail messages, and another one to access the resources on Amazon SES service. To do this, once the Lambda function is created, open IAM service in a new browser tab and click on the following options: Roles - > example-com-forwarding -> Policy Name AWSLambdaBasicExecutionRole-99b88501-cad9-4f48-ba03-75b13f98dae0 -> Edit Policy. In that last page add the JSON code in blue in the following screenshots:
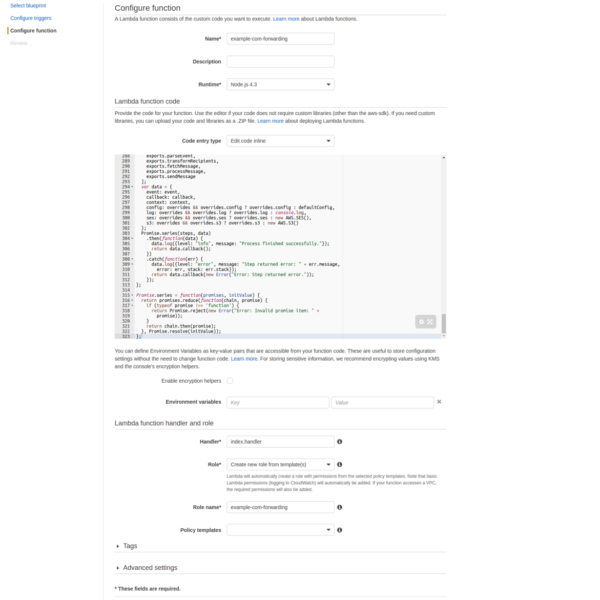
Lambda configuration for email forwarding
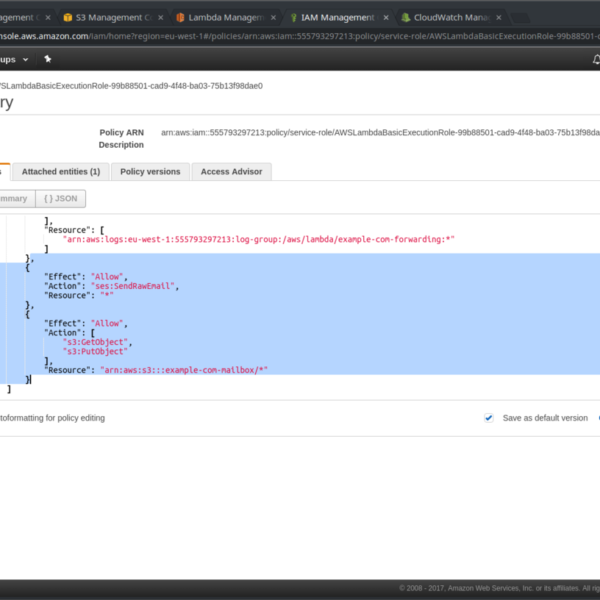
IAM policy permissions edition
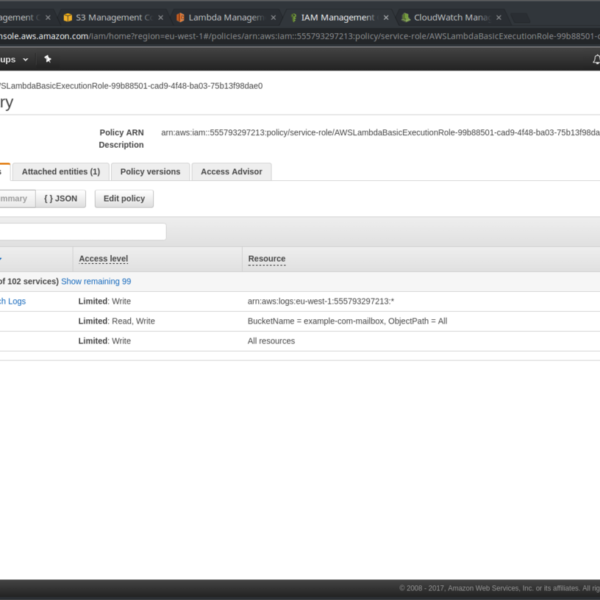
IAM policy summary
4. Create a new email reception rule in Amazon SES
Again from the main page of the Amazon SES service, click on the Rule Sets menu option and then on the button Create a Receipt Rule , which will initiate a procedure of 4 very simple steps that will culminate with the creation of a new mail reception rule for your domain. The first of these steps will be to create one or more mail recipients. Here you can enter a single email address within your domain, or just the domain name to allow mail reception for any address.

Amazon SES receipt rule creation: step 0
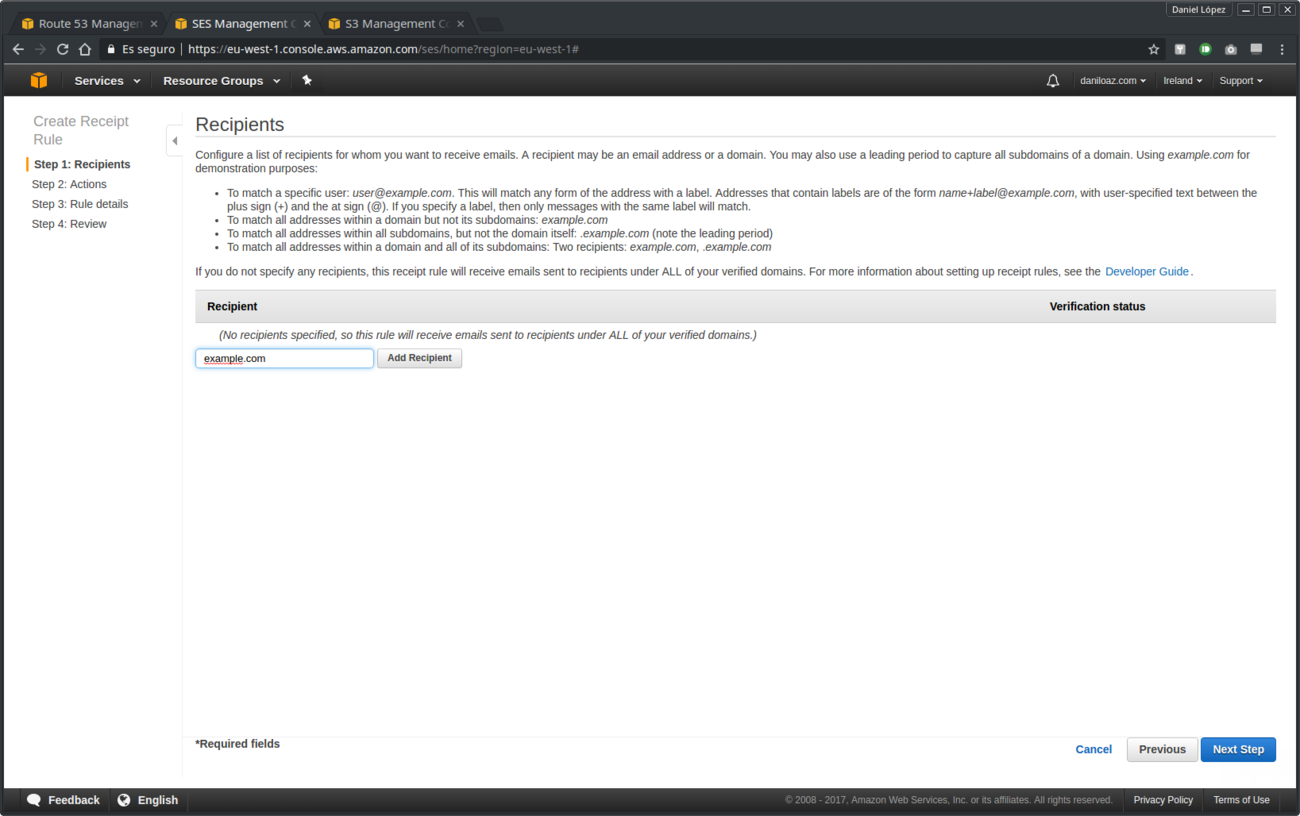
Recipient creation for Amazon SES receipt rule
Next create 2 actions that will be executed every time Amazon SES receives an email for your domain: store the message in an S3 bucket and then execute the Lambda function for it to be forwarded to your GMail account:

Amazon SES receipt rule action creation
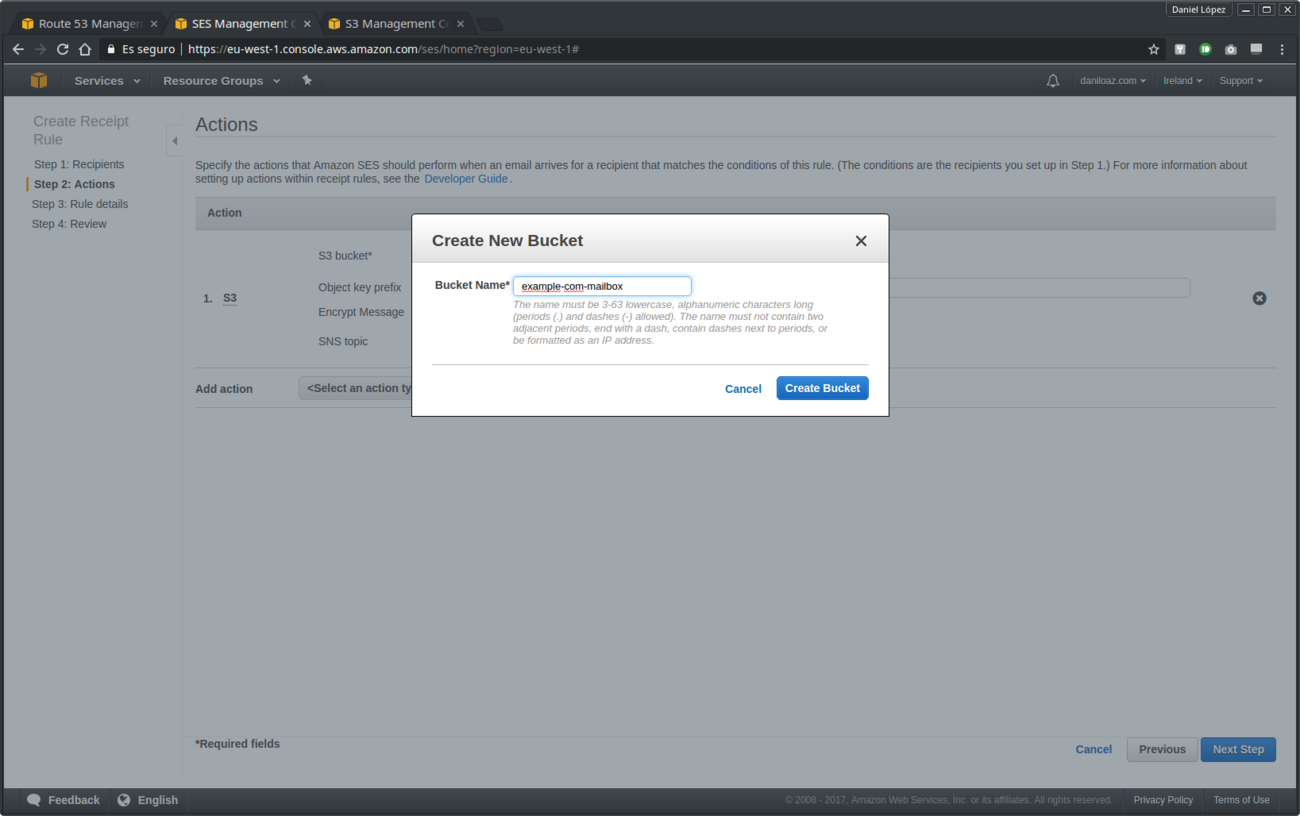
New S3 bucket creation
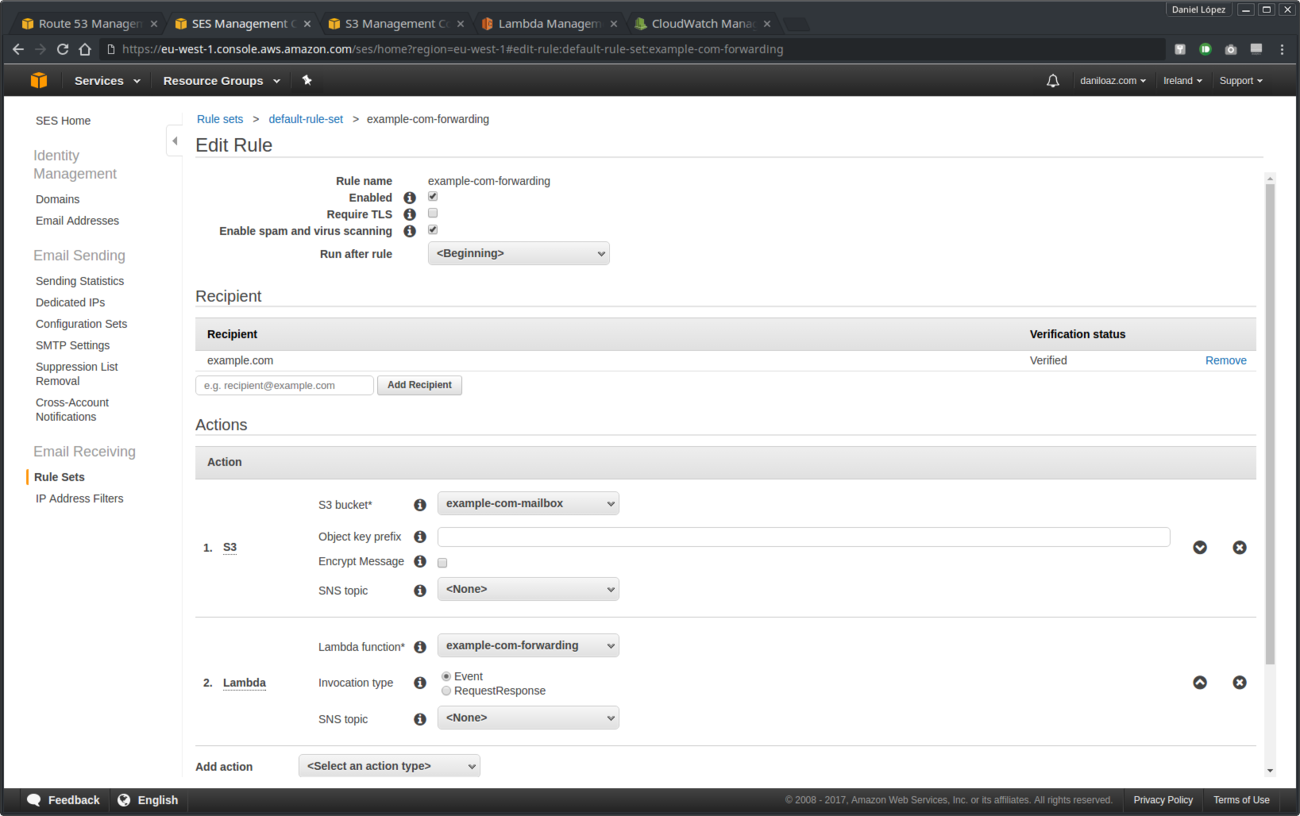
New S3 and Lambda actions created
After completing these steps the mail reception rule is completely configured, but maybe it doesn’t become active and you have to go back and set it active. So once configured and activated if you send an email to the adress or addresses you created for your domain (in our example any address within the example.com domain, ie info@example.com) you will see how the message is stored as a new object in the S3 bucket you just created when selecting the first action:
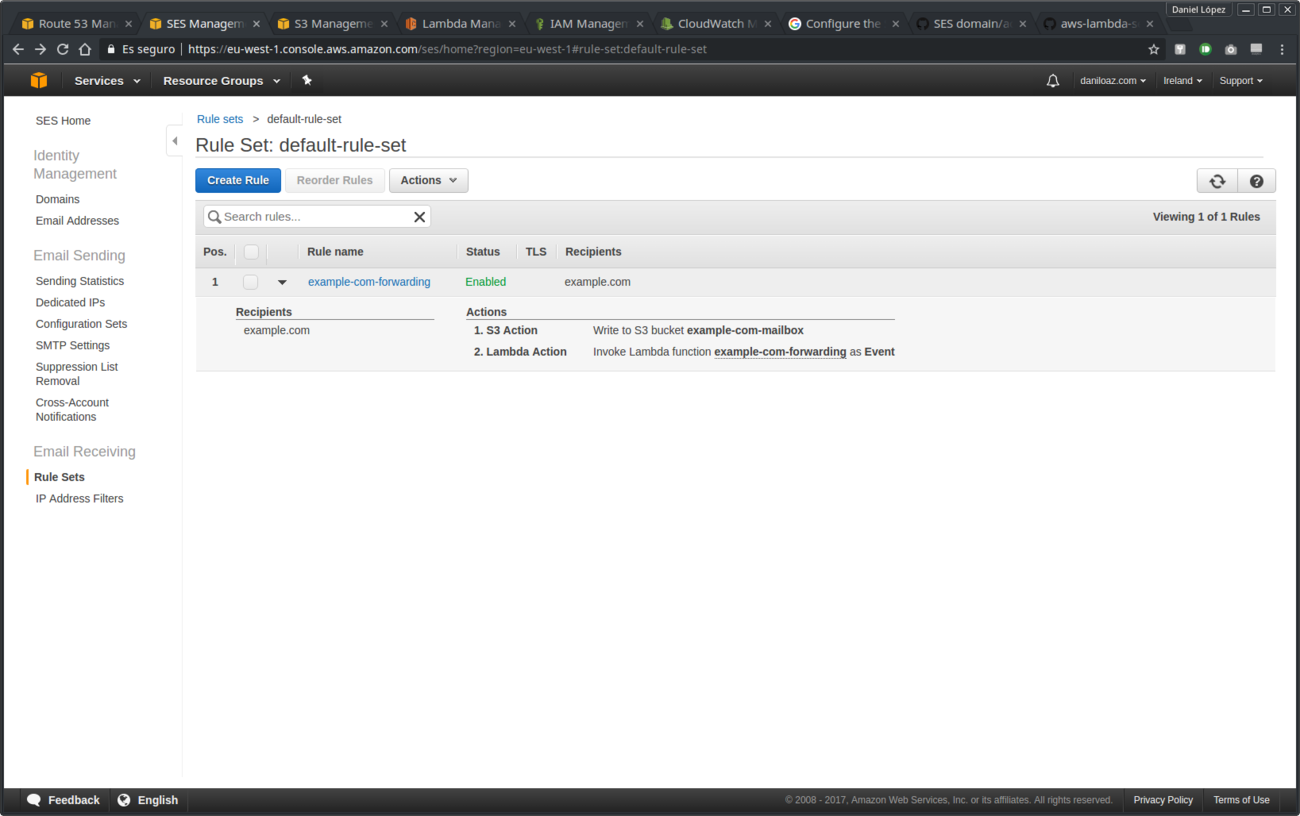
Receipt rule configured

List of email messages as S3 bucket objects
5. Verify your GMail address and create SMTP user
In order for Amazon SES to accept outgoing mail from your GMail account it is necessary to verify it and create an SMTP user :
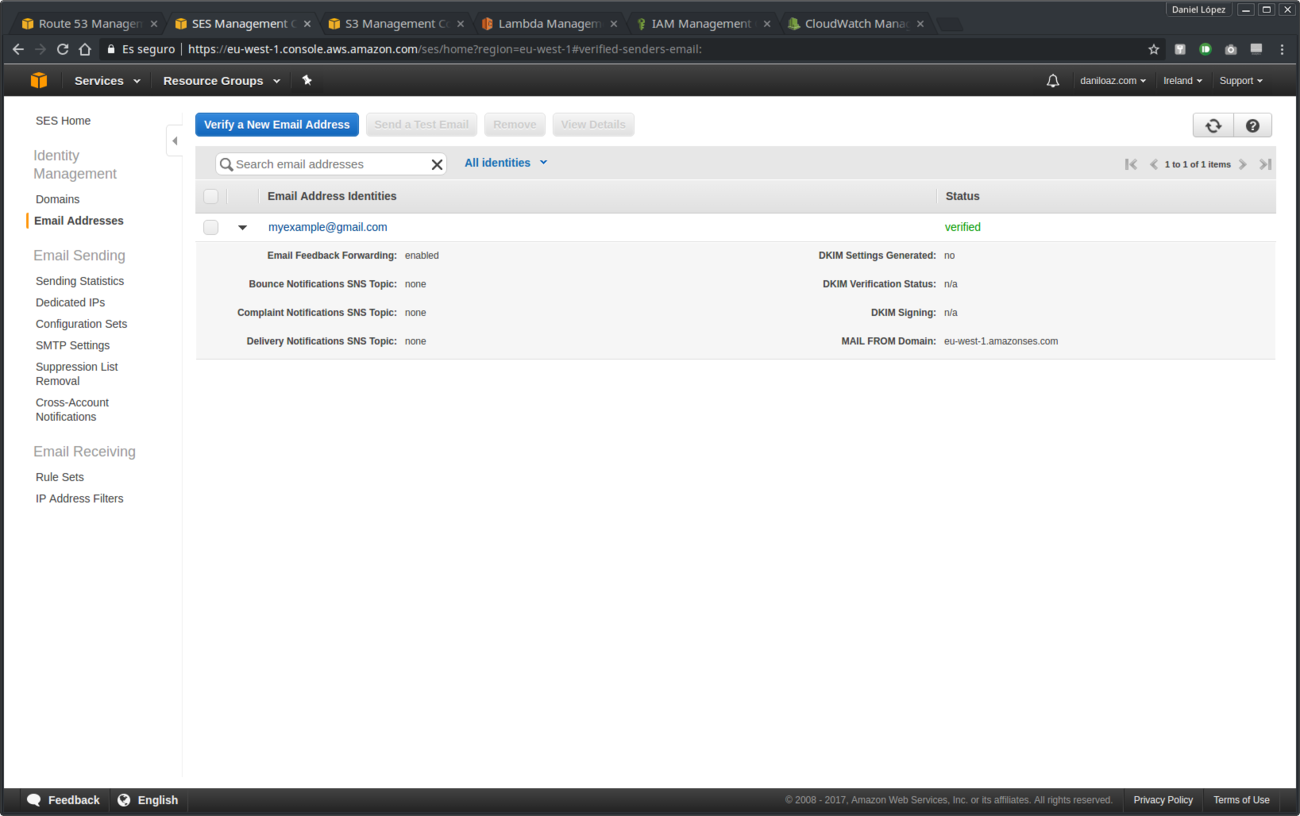
Own domain email address verification
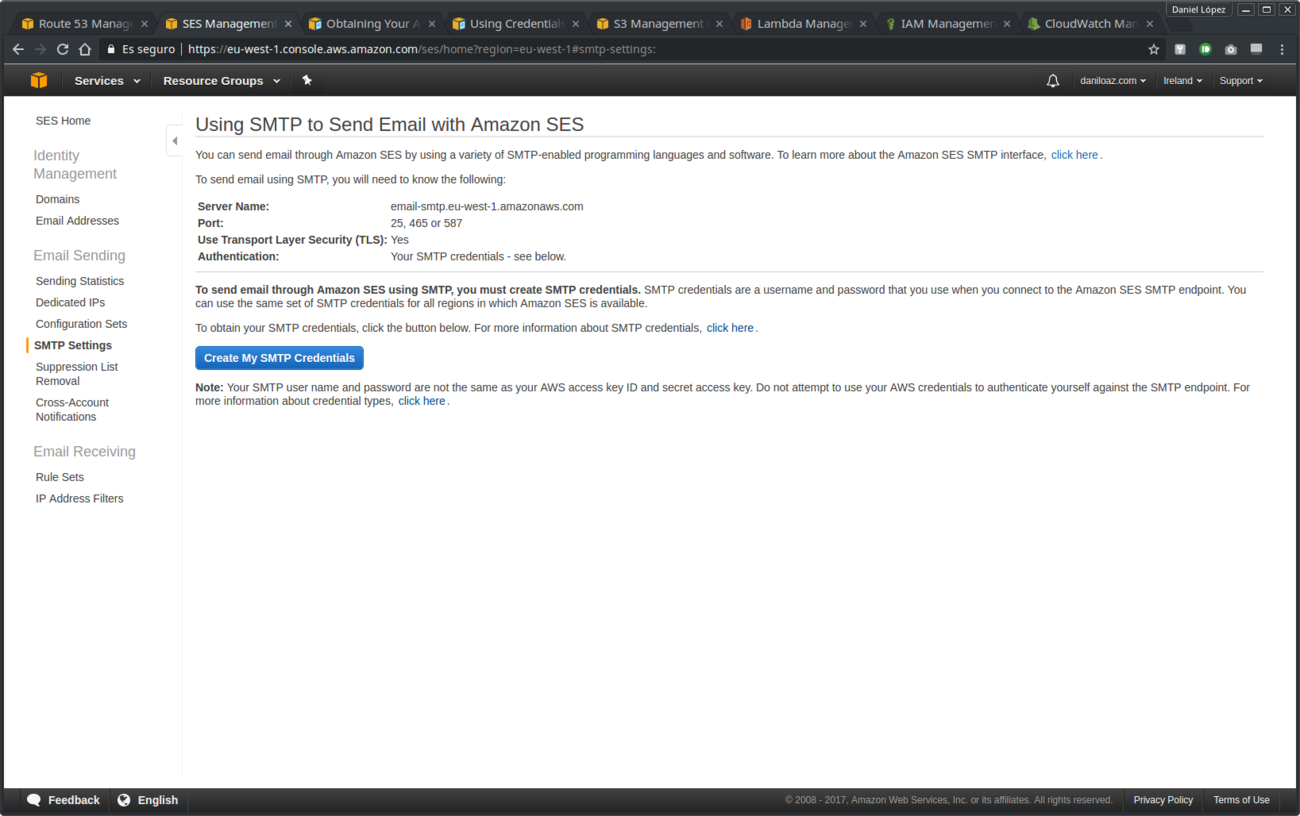
Outgoing email SMTP configuration data

SMTP user credentials created successfully
Initially your newly configured Amazon SES service will be quarantined (sandboxed) by Amazon as a measure of protection against possible abuse and spam. To remove it from quarantine and allow normal mailing you need to open a support ticket to Amazon and fullfill a request. Otherwise you will see how the emails you send bounce with the following error message:
554 Message rejected: Email address is not verified. The following identities failed the check in region EU-WEST-1: <a href="mailto:myexample@gmail.com" rel="noopener noreferrer" target="_blank">myexample@gmail.com</a>Below is the page from which you can request to be moved out of the sandbox and a request message example. In our example we asked for higher limits because we also want to use the Amazon SES service to send a weekly newsletter to our subscribers:
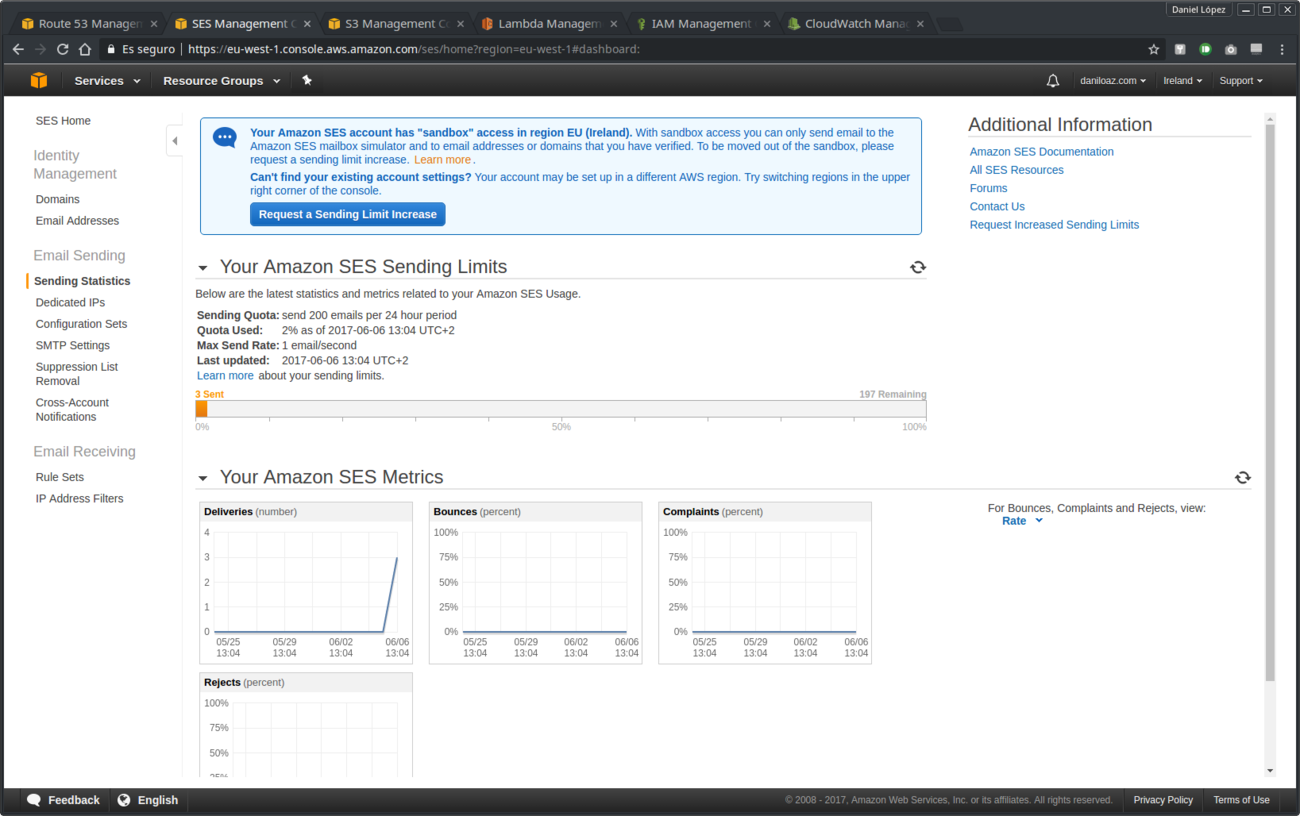
Sandbox warning and button to request sending limit increase
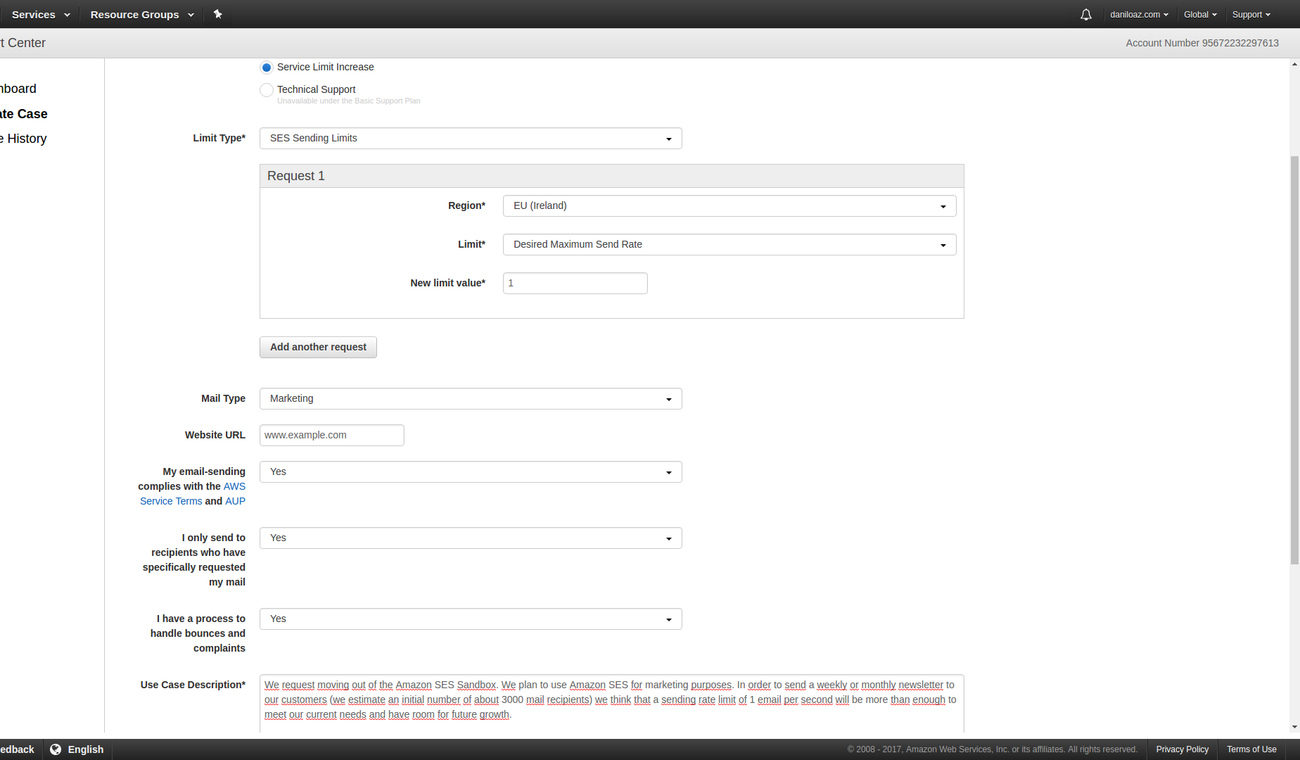
Example of Amazon support ticket to request moving out of sandbox and sending limit increase
6. Configure GMail to send email from your domain’s addresses
We reached the final stretch. The only thing left is to configure GMail to send mail by putting your domain’s address as sender (From: field). In order to receive mail, nothing is to be done, as this is the responsibility of SES service and does not require any additional configuration. Between the two screenshots below there is an intermediate step that consists of entering the SMTP configuration data that was obtained in step #5:
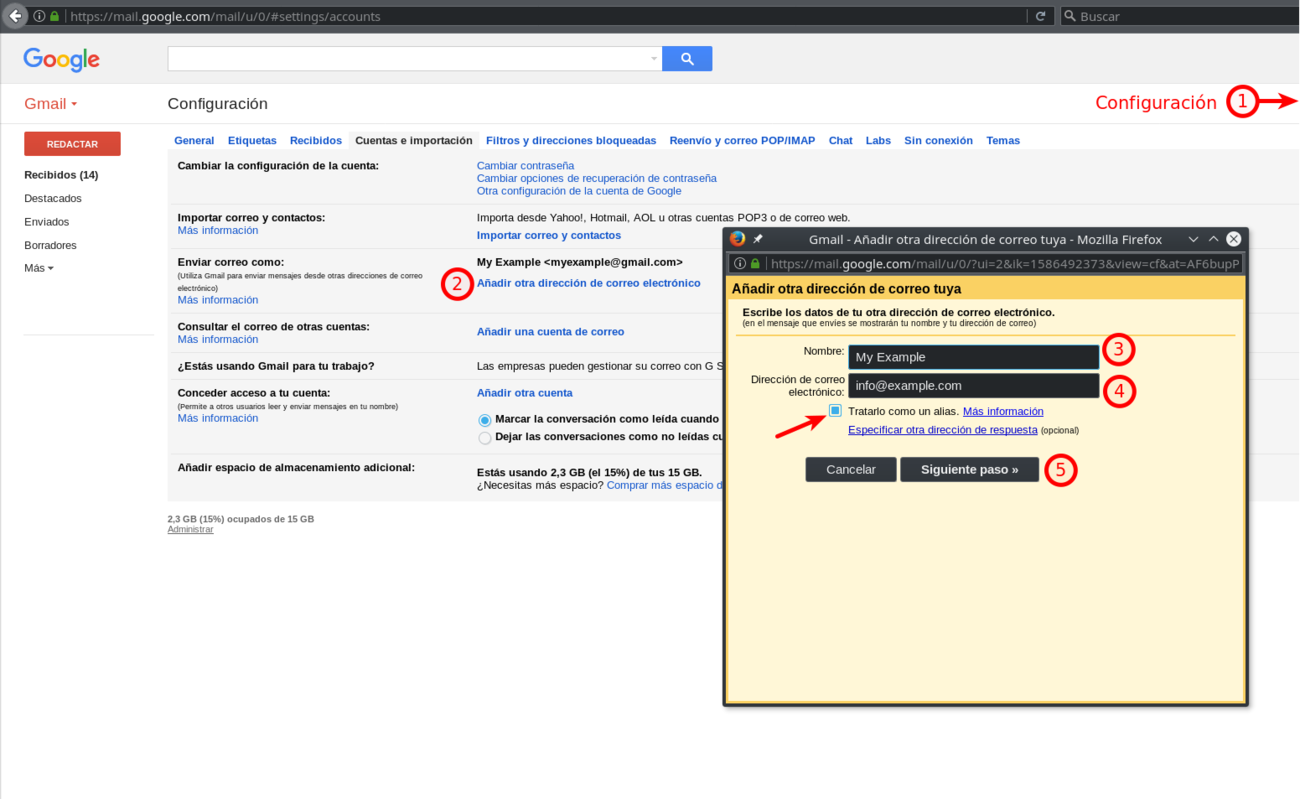
How to add multiple email addresses to GMail

GMail new address verification code
7. Debugging and mail sending statistics
Finally, if something went wrong and you don’t get your emails properly redirected you can have error debugging information and log messages from your Lambda function provided by the CloudWatch service. You can also obtain email sending and receiving statistics from SES (see image from previous section #5) and operating statistics of your Lambda function as you can see below:
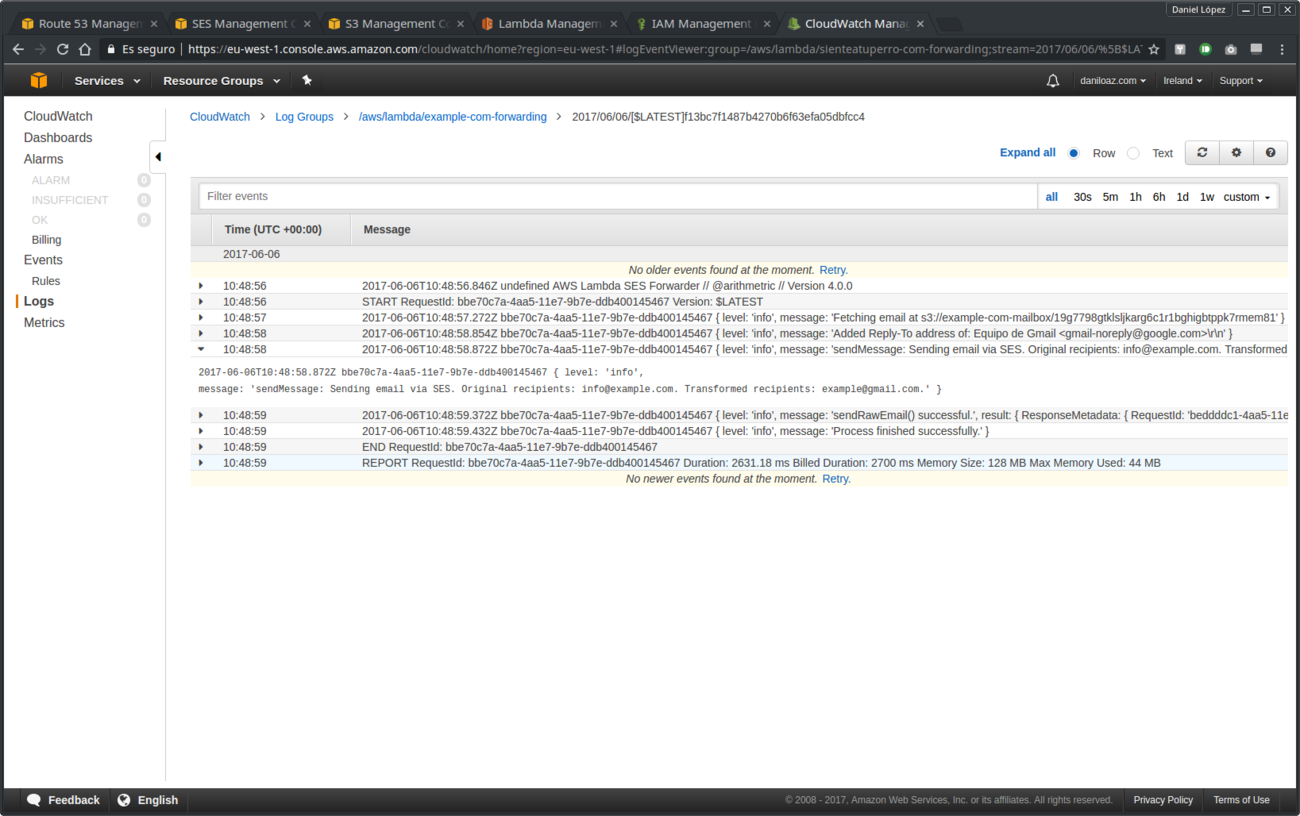
CloudWatch debugging and log messages
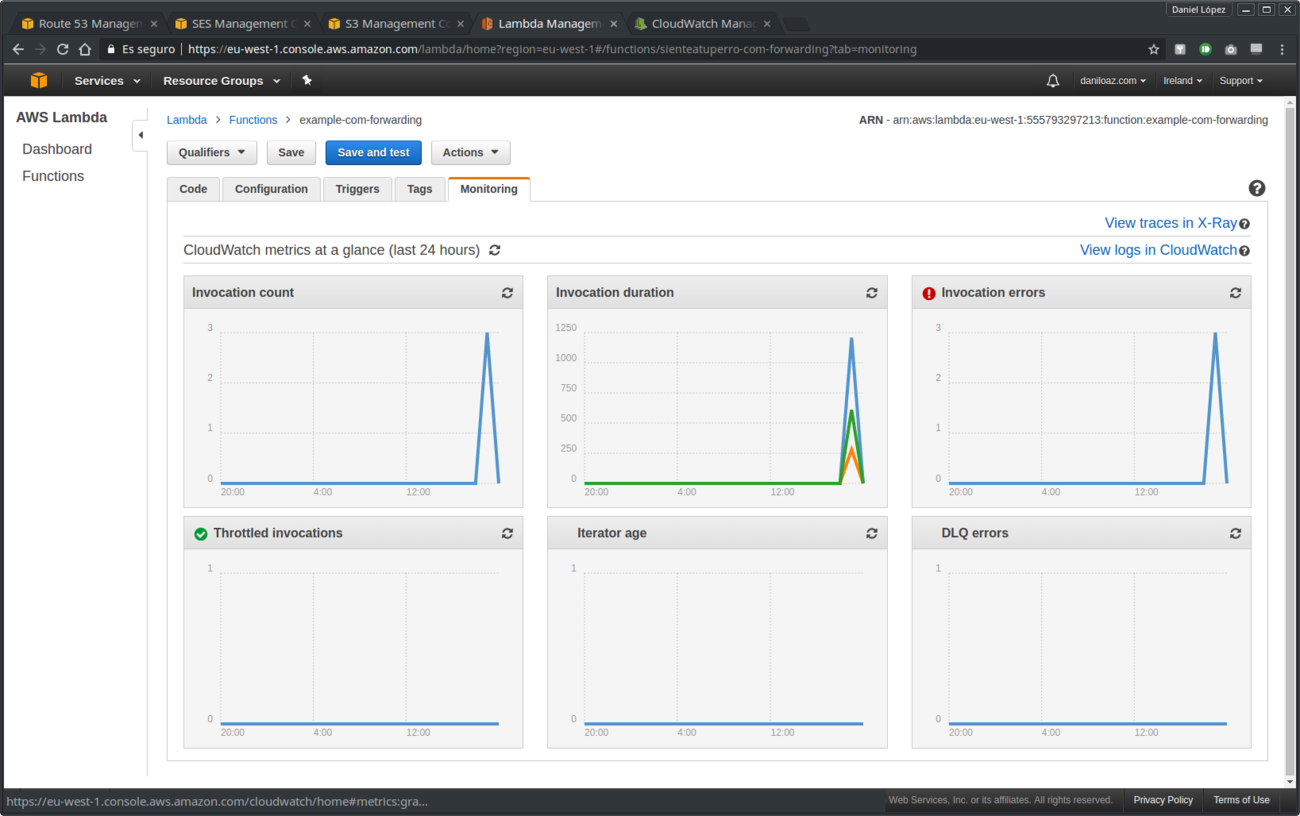
Forwarding email Lambda function statistics


Comments
Submit comment